

As a Software Engineer, i would like to learn how to dockerize my Python Fast API Framework and use this dockerize application in my lambda function. This will allow me to create my Docker image; which will contain my lambda function code. The built docker image will be published to a Docker Registry either Docker hub or Amazon ECR.
What is Docker? Docker is an open-source platform that automates an application's packaging, deployment, scaling, and management using containerization. Containers are self-sufficient, executable software packages that contain everything required to execute an application including source code, libraries, runtime, and system tools. An application built with Docker ensures that all the dependencies and applications used in creating the application are packaged as a single container.
I will walk you through on how you can dockerize your Python-Based FastAPI application ande deploy it as a Lambda Function.
What is AWS Lambda? Lambda is a serverless AWS computing service that allows you to run your code without the need to provision or manage servers. Traditionally, Lambda functions are written in supported languages and deployed as ZIP files containing your source code and its dependencies. However, Docker is now supported for AWS Lambda which provides greater flexibility by allowing developers to package and deploy Lambda functions as a container image.
Dockerizing your lambda functions provides the following benefits such as:
- Custom Runtimes: Docker allows you to use any programming language or runtime environment giving you enough flexibility on how to create your lambda function.
- Dependency Management: Docker allows you to package your lambda function with its dependencies and this ensures that there is there is consistent behavior across different environments by eliminating the statement “It works on my computer but it is not working on your computer”
- Larger Deployment Packages: Docker allows the capability to package larger dependencies as Docker images can be up to 10GB in size compared to the 50MB limit for ZIP packages, allowing you to include larger dependencies or resources in your lambda function.
- Version Control: Docker images can be versioned and tagged, allowing the lambda function to be easily rolled back or forward accordingly.
This article explores the benefits of using Docker-Based Python Application,how to create and deploy a Dockerized Lambda function, and best practices for optimizing Docker images for Lambda. This is an assumption that you already have an understanding of Python, AWS, Docker and Bash
Example Workflow: Dockerizing a Lambda Function
Step 1: Write Your Lambda Function Code
Create your application code with the file name (e.g. lambda.py)
from mangum import Mangum
from fastapi import FastAPI

app = FastAPI()

@app.get("/api")
def read_root():
    return {"Welcome": "Welcome to the FastAPI on Lambda"}

@app.get("/health")
def read_health():
    return {"Health": "Checking endpoint"}

@app.get("/message")
def read_message():
    return {"Message": "sending message"}

handler = Mangum(app)
Step 2: Create the requirements.txt
The requirements.txt file will contain the dependencies required to run the application and this will be fastapi and mangum
fastapi
mangum
Step 3: Create a Dockerfile
Define the environment and dependencies in a Dockerfile. In this example, I am using ubuntu as the base image
# Stage 1: Build dependencies
FROM ubuntu:22.04 as builder

# Set working directory
WORKDIR /app

# Install build dependencies
RUN apt-get update &&
    apt-get install -y python3 python3-pip

COPY requirements.txt /app/

# Install from requirements.txt
RUN pip3 install --no-cache-dir -r /app/requirements.txt -t /app/site-packages

# Stage 2: Create final image
FROM amazon/aws-lambda-python:3.10

# Copy dependencies from the builder stage
COPY --from=builder /app/site-packages "${LAMBDA_TASK_ROOT}"

# Set working directory
WORKDIR /var/task

# Copy Lambda function code
COPY lambda.py ${LAMBDA_TASK_ROOT}/lambda.py

# Set the Lambda handler
CMD [ "lambda.handler" ]
Step 4: Build the Docker Image
This is an assumption that you have Docker running on your workstation. Use Docker CLI to build the image.
docker build -t my-docker-lambda .
Step 5: Test the Docker image locally
docker run -p 9000:8080 my-docker-lambda
Step 6: Invoke the Lambda function
The event.json file contains the details of the json payload that will be used to test the lambda function.
{
  "resource": "/{proxy+}",
  "path": "/api",
  "httpMethod": "GET",
  "headers": {
    "Content-Type": "application/json"
  },
  "multiValueHeaders": {},
  "queryStringParameters": {},
  "multiValueQueryStringParameters": {},
  "pathParameters": null,
  "stageVariables": null,
  "requestContext": {
    "resourceId": "123456",
    "resourcePath": "/{proxy+}",
    "httpMethod": "GET",
    "extendedRequestId": "request-id",
    "requestTime": "01/Jun/2023:12:00:00 +0000",
    "path": "/api",
    "accountId": "123456789012",
    "protocol": "HTTP/1.1",
    "stage": "test",
    "domainPrefix": "testPrefix",
    "requestTimeEpoch": 1609459200000,
    "requestId": "cbb8dc9e-68d4-4676-b618-5c35d1c6c32a",
    "identity": {
      "cognitoIdentityPoolId": null,
      "accountId": null,
      "cognitoIdentityId": null,
      "caller": null,
      "sourceIp": "127.0.0.1",
      "principalOrgId": null,
      "accessKey": null,
      "cognitoAuthenticationType": null,
      "cognitoAuthenticationProvider": null,
      "userArn": null,
      "userAgent": "Custom User Agent String",
      "user": null
    },
    "domainName": "test.example.com",
    "apiId": "api-id"
  },
  "body": null,
  "isBase64Encoded": false
}
This command below will enable you to test the lambda function locally before publishing it to AWS
curl -XPOST "http://localhost:9000/2015-03-31/functions/function/invocations" -d @event.json
This is the output of the JSON command

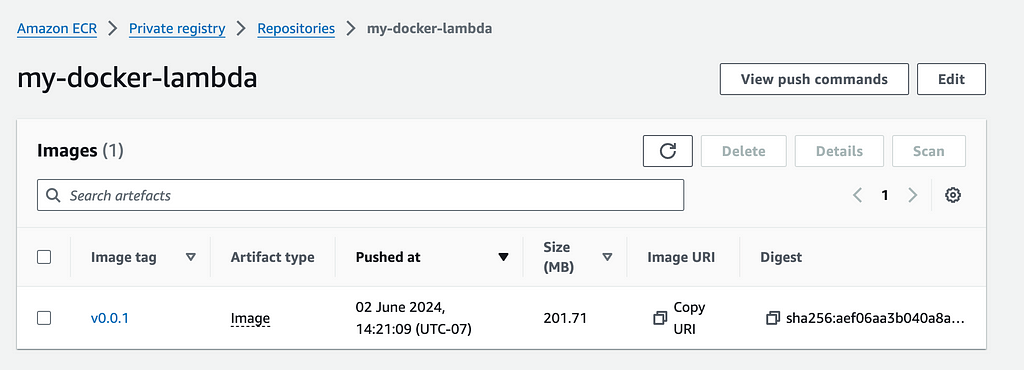
Step 7: Push Docker Image to Amazon ECR
Before pushing your Docker image to Amazon ECR, you must authenticate with AWS services using either IAM roles or AWS access keys and secret keys.
Replace <your_account_id>.dkr.ecr.us-east-1.amazonaws.com with your newly created Amazon ECR URI
aws ecr create-repository --repository-name my-docker-lambda
aws ecr get-login-password --region us-east-1 | docker login --username AWS --password-stdin <your_account_id>.dkr.ecr.us-east-1.amazonaws.com
docker tag my-docker-lambda:latest <your_account_id>.dkr.ecr.us-east-1.amazonaws.com/my-docker-lambda:v0.0.1
docker push <your_account_id>.dkr.ecr.us-east-1.amazonaws.com/my-docker-lambda:v0.0.1
Once you push the Docker image to ECR, you will have your Docker image in Amazon ECR similar to the screenshot below
Step 8: Create an IAM Role on AWS
You will need an IAM role with an invoke function to be able to run the lambda function. The command below will create a role with reference to the file trust-policy.json
aws iam create-role --role-name my-docker-lambda-role --assume-role-policy-document file://invoke-function-policy.json
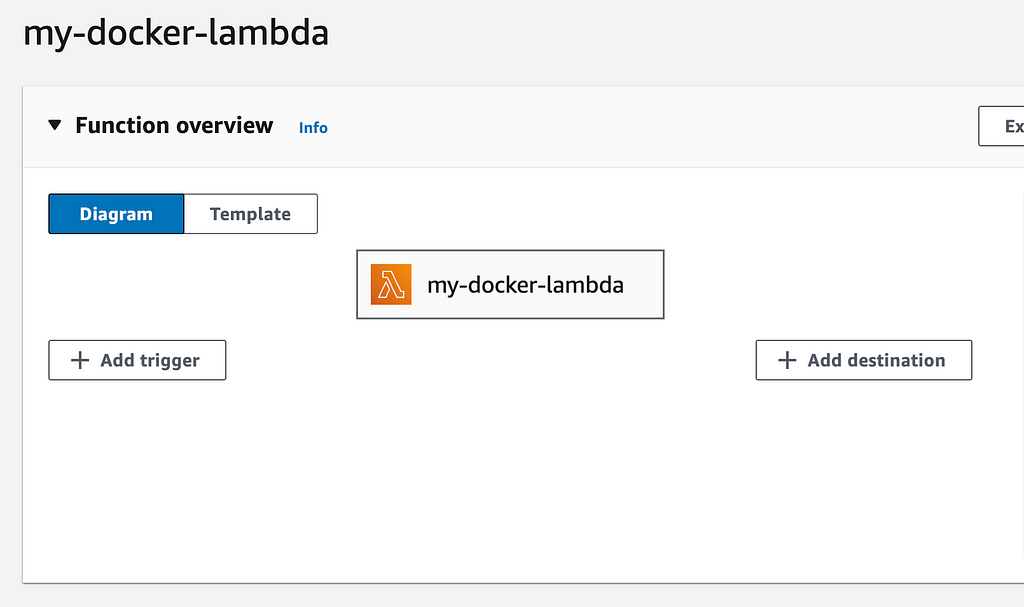
Step 9: Create the Lambda Function
Use the command below to create a Lambda function. ImageUri will be the details of the image URI in your Amazon ECR and the IAM role will be the newly created role. Replace <your_account_id>.dkr.ecr.us-east-1.amazonaws.com with the Docker image URI from Amazon ECR and arn:aws:iam::<your_account_id>:role/execution_role
aws lambda create-function --function-name my-docker-lambda
--package-type Image
--code ImageUri=<your_account_id>.dkr.ecr.us-east-1.amazonaws.com/my-docker-lambda:latest
--role arn:aws:iam::<your_account_id>:role/execution_role
Once the lambda function is successfully created, you will be presented with a similar screenshot as below.
Step 10: Test your Lambda function from the AWS Console
The next step is for you to test your lambda function from the AWS console.
Conclusion
I hope you find this process of dockerizing Python-based aws lambda functions useful. Check out the complete code on GitHub
![]()